Tag Archives: Gluten free recipe

Roasted Brussels Sprouts

OLYMPUS DIGITAL CAMERA

Like everyone else that I know, one of Seyfi and mine`s new years resolutions is to eat more healthy.  It`s not that we have a very unhealthy diet, but we have days where we can get a bit lazy, and eat anything, not thinking about the health benefits of it.

On this same track, we have decided that we should eat more vegetables, less meat, and try out as many new recipes as we can.

So far it is going really well.  We both feel so much better, more energetic, and the girls are eating everything so far as well.

Part of the new foods we have been eating is brussels sprouts.

I have never really liked brussels sprouts, the are a bit stinky, and have an odd taste.

Growing up my brother and I used to share one, just to be able to say that we had at least tried one.

I decided to give them a try, they do seem to be very trendy right now, and we are so close to Brussels, and they are in season…

However, I decided that I would not cook them the way my mother does… she boils them, and calls them delicious…

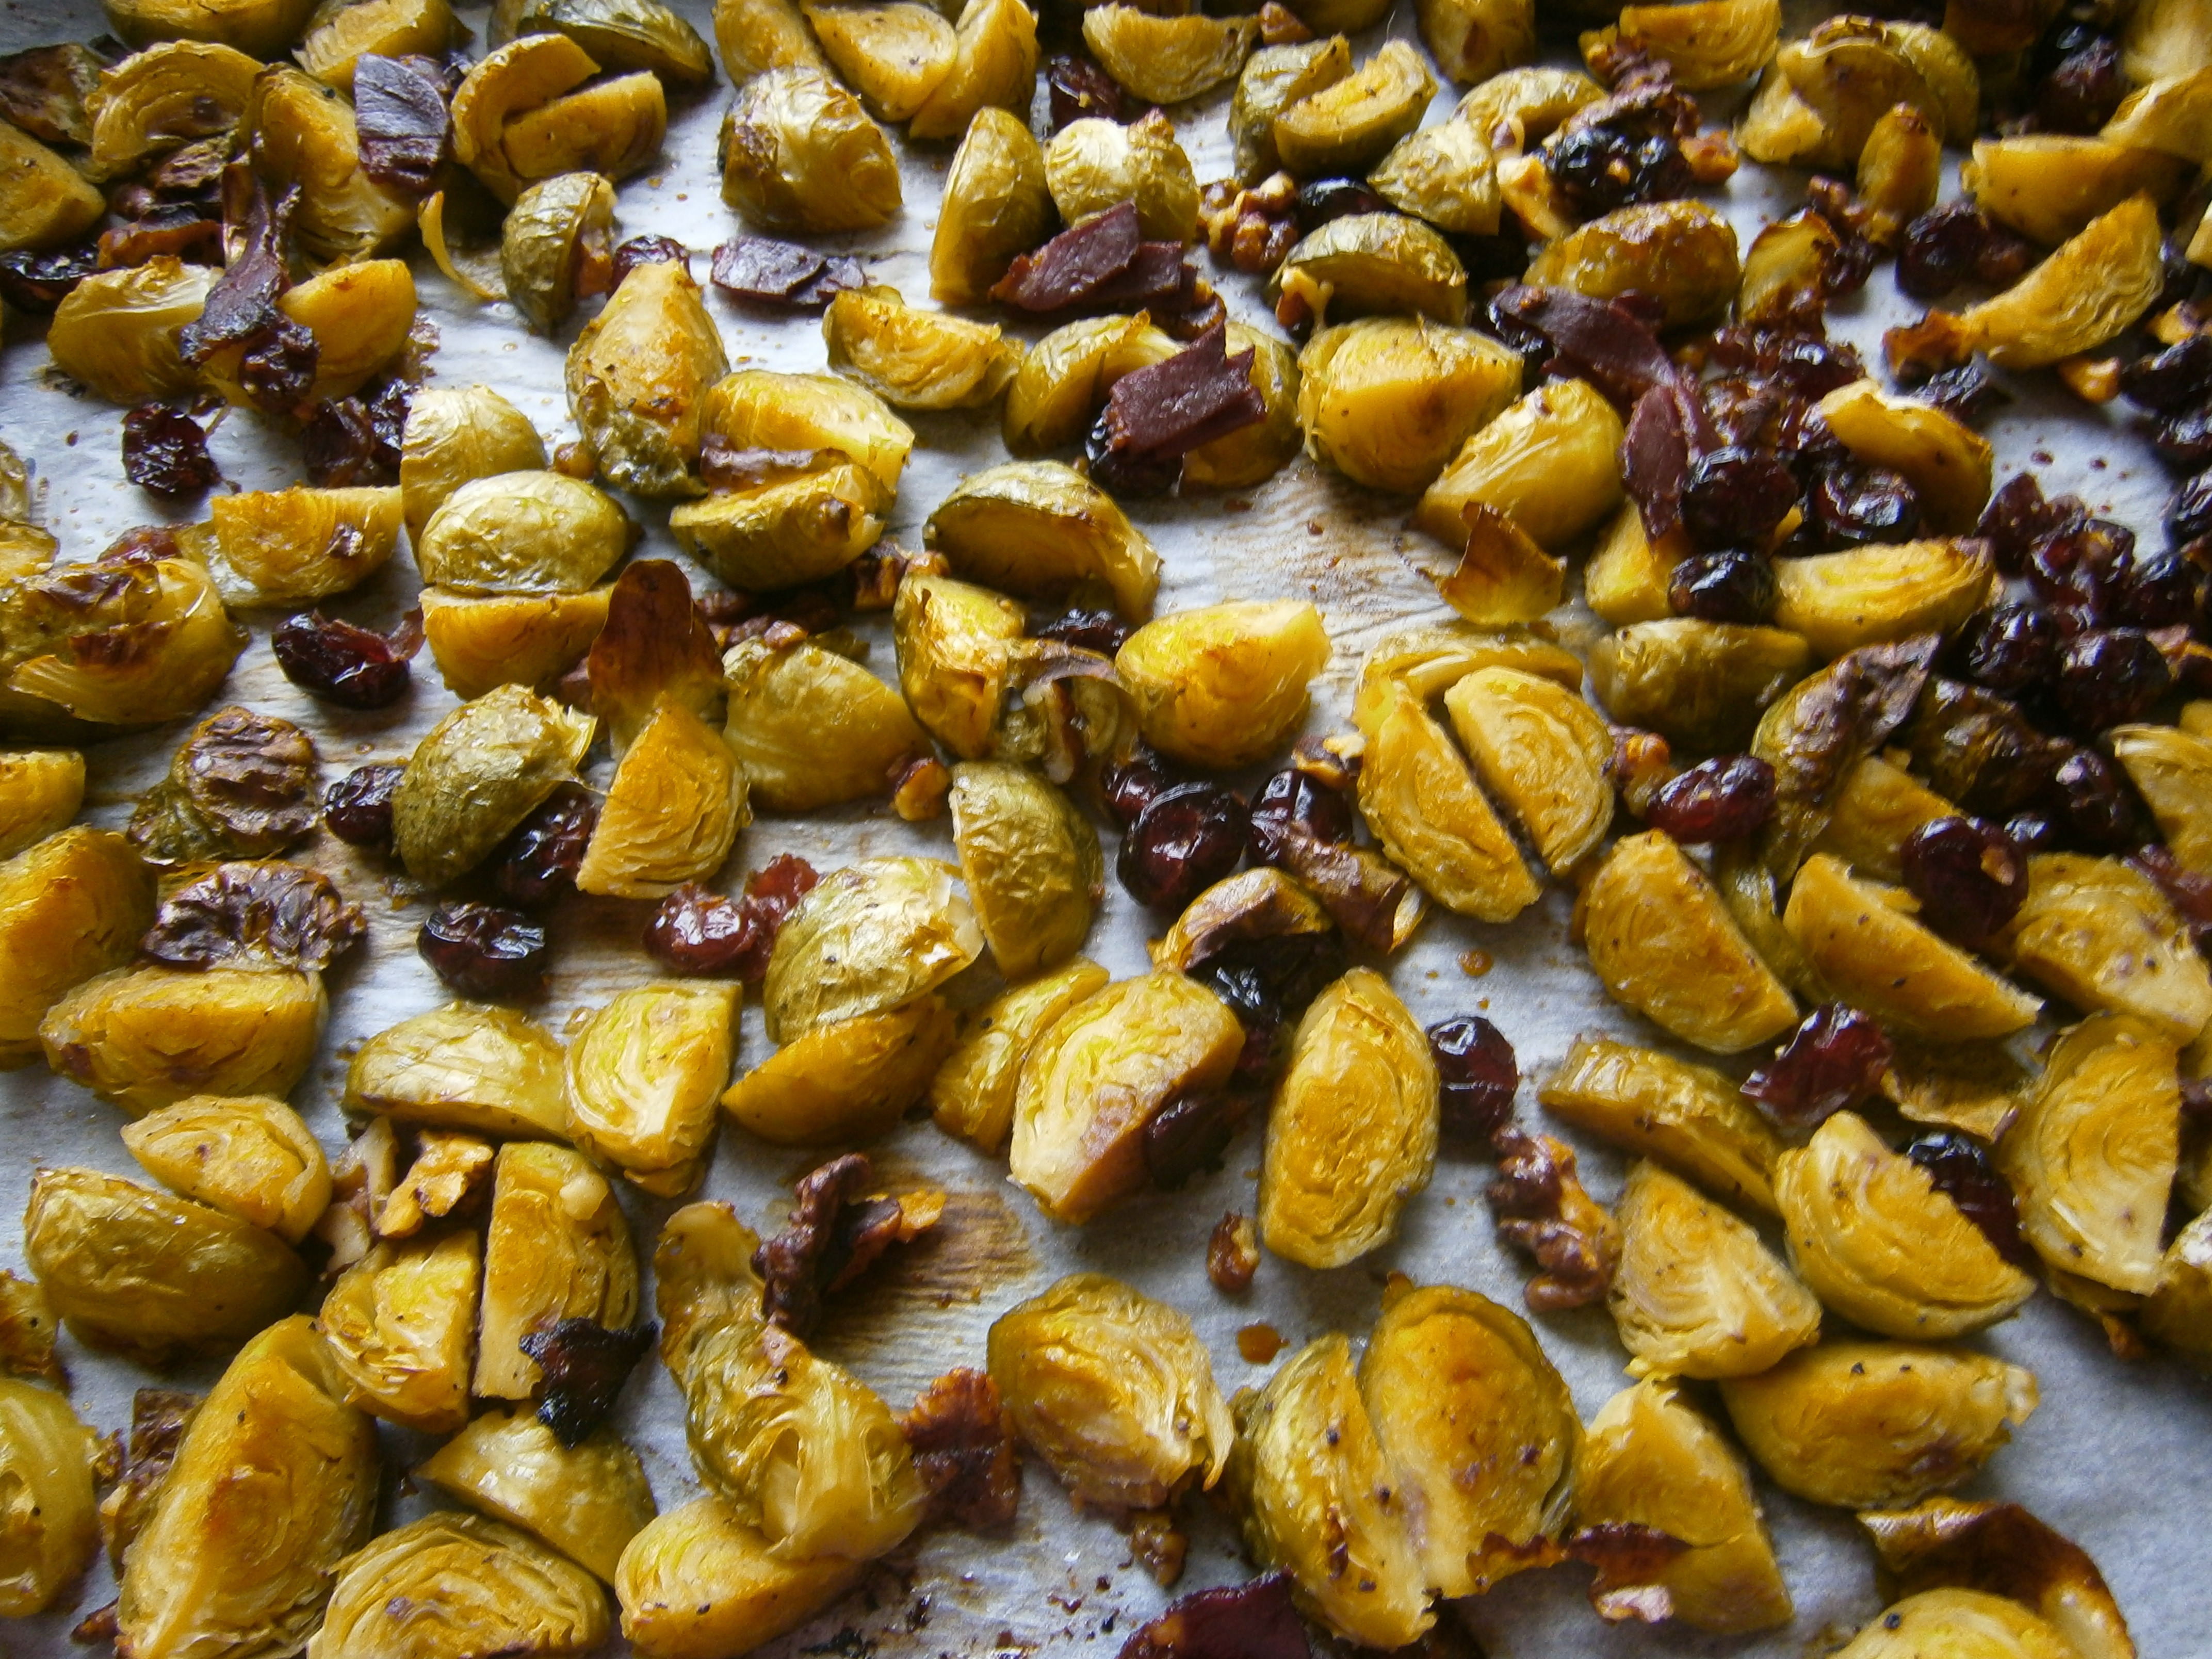
I found this recipe for them roasted with a Honey-Dijon sauce on them, they are so delicious!  I swapped out the honey for agave syrup so that Ela could have some as well.

If you think you don`t like brussels sprouts, give this recipe a try, it just may change your mind!

Honey-Dijon Brussels Sprouts

Adapted from Parents Magazine

1/4 c. dried cranberries

1 c. boiling water

2 Tbsp. agave syrup

1 Tbsp. olive oil

1 Tbsp. dijon mustard

1/2 tsp. salt

1/4 tsp. pepper

1/2 kg. trimmed and quartered Brussels sprouts

1/4 c. chopped walnuts

Preheat oven to 375 C.  Soak the cranberries in the boiling water for 5 minutes and then drain the water.

In a large bowl, mix the agave syrup, oil, mustard, salt and pepper.  Add the cranberries, brussels sprouts and walnuts.  Toss well.

Spread the dressed brussels sprouts in a single layer on a baking sheet.   Roast for 30 minutes or until the brussels sprouts are tender, and the leaves are just beginning to brown.

Enjoy!

Fancy Meringues


Do you ever feel that some recipes a suited better for different seasons, or weather?

Well this is definitely a summer recipe.

In the summer when it is so hot (hopefully ;-)), I never feel like having a really heavy dessert, and I usually prefer to have something easy, and fresh, this is it.

Simple, yet fancy, sweet, but fresh. The perfect summer dessert.

I had never really eaten a meringues until I went to Turkey, and even then I rarely ate them because, let’s be honest, they are a bit boring on there own, but they are gluten free, which makes them an easy option.

Then I saw this recipe, and made it.

It is so light and fresh, plus it is super easy! Give it a try!

Fancy Meringues
Adapted from Jamie Oliver 30 Minute Meals

4 meringues, nest-shaped works best, but any shape will do.
4 tbsp Lemon curd
a handful of strawberries, cut up small,
1 tsp of strawberry jam
4 tbsp plain yoghurt

Mix together the strawberries, jam and yoghurt.

Scope a tablespoon of lemon curd onto each meringue. Top with the strawberry yoghurt. Serve.

How to Poach an Egg


I’ve tried to poach eggs before, and it has always ended in disaster.

Soggy, undercooked eggs that are slimy.

I think I know now what the problem was, I wasn’t using fresh eggs.

Well, now that I’ve got loads of fresh eggs (ok, two to four eggs a day), I thought I would try poaching them again.

I’ve been working on this skill for the past week, and I think I’ve got it down now.

Here is my step by step guide to…

A Perfect Poached Egg


Start with a pot of water that has got about five centimeters of simmering water in it. Make sure that it hasn’t come to a rolling boil.

Crack a fresh egg into a separate bowl.


Pour your egg into the pot of water and let it sit for a few seconds. You can pull the edges of the egg up onto itself if necessary. This egg was really fresh, so it kept together really well.

Let it cook for about two minutes if you like your eggs drippy (runny, whatever adjective you use to describe an egg that you can dip toast into.)


When it is cooked to your liking, lift the egg out with a slotted spoon.


Let it dry a bit on some paper towel.


Season with salt and pepper, and serve.

Very easy, and very delicious!

Baked Camembert


Cheese.

Is there anything better?

I love living in this part of Europe, if for nothing than the variety of cheeses.

Hard, soft, stinky, sweet, white, yellow, orange and blue, old, young, every kind of cheese you could ever imagine.

I have fallen in love with Camembert. A soft cheese, stinky cheese. It tastes so good on a piece of crusty baquette with some grapes on the side… Heavenly.

I do like my Camembert the traditional way. However, sometimes I buy a Camembert, and it ends up sitting in my fridge for a bit too long, and it is no longer as soft as I would like.

So I bake it.

It becomes so ooey-gooey, and the herbs give it a lovely new flavour layer.


Here’s my recipe for baked Camembert…

Baked Camembert

1 Camembert cheese in it’s wooden box.
1 clove of garlic, minced
2 tbsp olive oil
A small handful of fresh oregano, torn
Fresh ground pepper

Preheat your oven to 200C

Remove the cheese from the plastic wrapping and place it back in it’s wooden box.

Score a circle into the top of the cheese and pull of the circle of rind.

Put the garlic, oregano. Pepper and oil in the cut out circle.

Put in the oven for about ten minutes.

Remove and eat. If it is too runny, let it sit for a few minutes to firm up.

Chicken Cacciatore


This week has been feeling a bit crazy for some reason.

Probably because Alara’s normal school has been on break, so we have sent her to an art class in the afternoons.

The art class is actually really great. She is going to an artist studio with some other kids, and they are making art together. She is loving it!

The only problem for me is that the class finishes at five, and then we come home for a bit, and then head out to get Seyfi from work.

This time lapse means that I need to be cooking something that is a bit forgiving… Something that can sit for a bit and still be delicious.

This chicken cacciatore is just that. Easy to throw together, than throw it in the oven, pull it out and it can rest.

Here’s the recipe:

4 chicken legs
1 red pepper, sliced a bit large
1 onion, largely sliced
1 carrot, diced
1 celery stalk, sliced
5 cloves garlic, smashed
1 can of tomatoes
1 cup of tomato sauce (plain)
1 Tbsp basil
1 tsp oregano
Salt and pepper

Preheat your oven to 200C
In a big oven dish mix all the ingredients together, covering the chicken.
Cover with tin foil.
Bake for twenty minutes.
Remove the cover and bake for twenty more minutes.
Serve.

I served it with rice, but I’m sure pasta would be nice too.